How to Configure and add Windows Operating System in WDS server
 |
| Windows Deployment Services |
First of all thanks to all my friends who visited my site to rectify
their problems and I’m glad to help them.
Today I will show you How to add Client Operating System in
WDS server. Whether it’s Windows 7 or Later Operating System but the procedure
is the same to all Operating System. For doing this we need to first configure
WDS server. If you don’t know how to do that then you should look:
How to Install WDS server first.
So let’s start making some fun with windows server operating
system.
So let’s first open WDS Console.
For doing this we need to go to
START and type
WDS and then
select
Windows Deployment Services from search result.
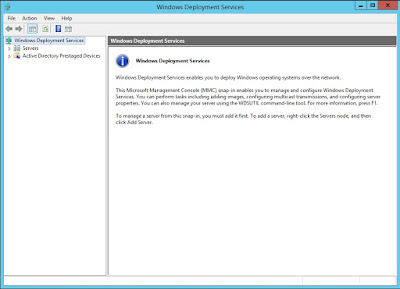 |
| WDS Console |
After opening WDS Console then expand Servers, right click
on the WDS server and click on Configure Server.
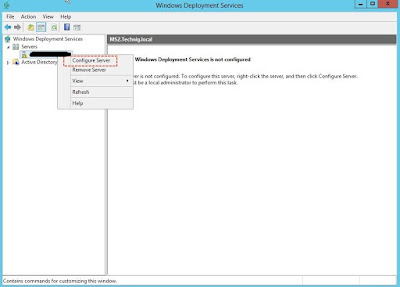 |
| Windows-Deployment-Services-Console |
Read the requirements once before you click
next.
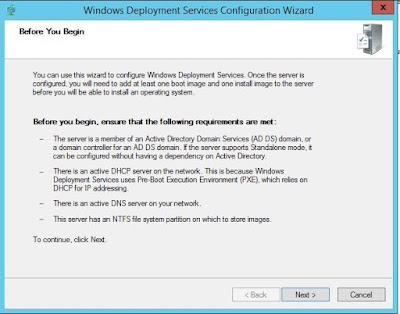 |
| WDS-Configuration-Wizard |
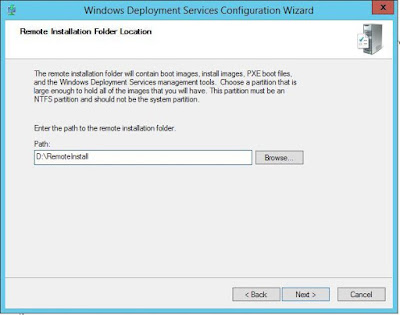
Choose the Remote Installation Folder location on other
drive.The folder contains the boot images, install images, and so make sure
this drive has enough space to hold the data. Click on Next.
 |
| Remote-Installation-Folder-Location |
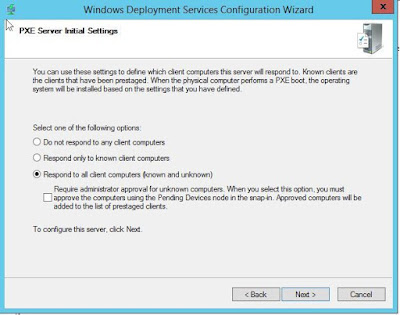
For best result select Respond to all client computers
(known and unknown). Click on Next.
 |
| WDS-PXE-Server-Initial-Settings |
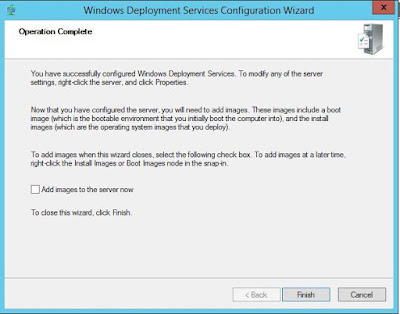
Uncheck the checkbox for Add images to the server now. We
will add the images in the next step. Click Finish
 |
| WDS-Operation-Complete |
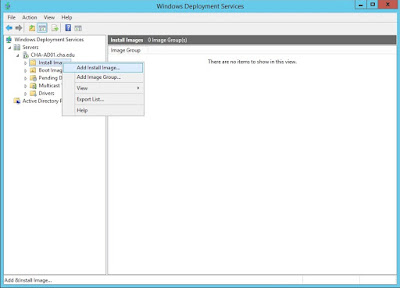
We need to add two types of images in WDS, install.wim and
boot.wim. The install.wim images are the operating system images that you
deploy to the client computer. So we are going to add install.wim from
X:\Sources\install.win (X: is DVD Drive letter)
 |
| WDS-Add-Install-Image |
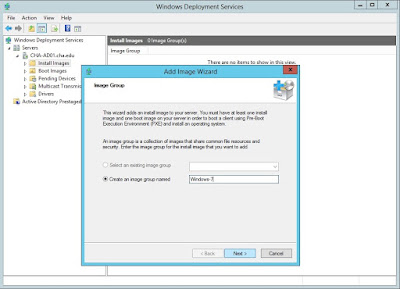 |
| WDS-ADD-Image-Group |
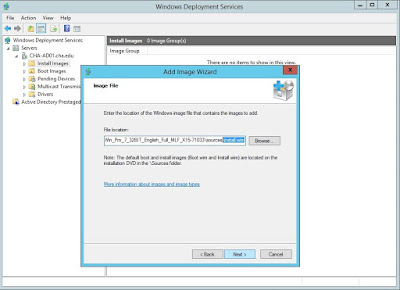 |
| WDS-ADD-Install.wim |
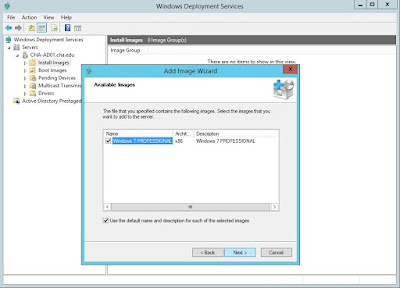 |
| WDS-Available-Images |
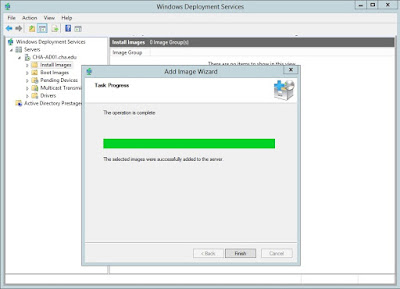 |
| WDS-Add-Image-Task_Progress | | |
To boot you system through network card, you must add the
boot.wim image of the latest Windows Operating System. The Boot.wim images are
Windows PE images that you boot a client computer to perform an operating
system installation. So we are going to add boot.wim from X:\Sources\boot.win
(X: is DVD Drive letter)
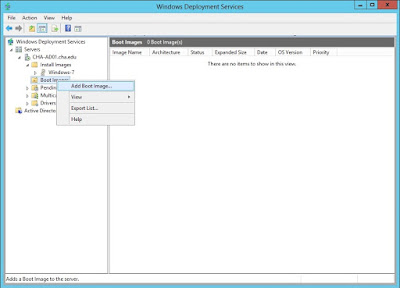 |
| WDS-ADD-Boot.wim | | |
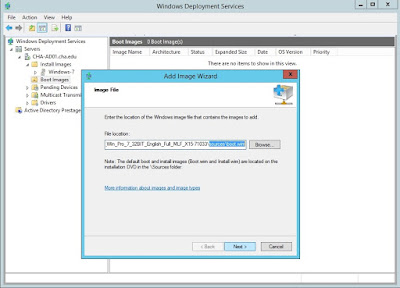 |
| WDS-Boot.wim location |
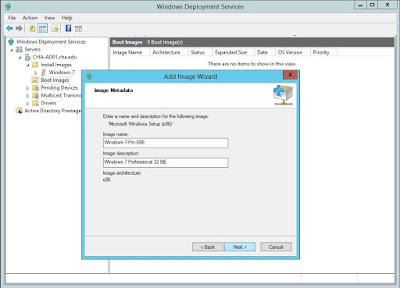 |
| WDS- Boot Image Metadata |
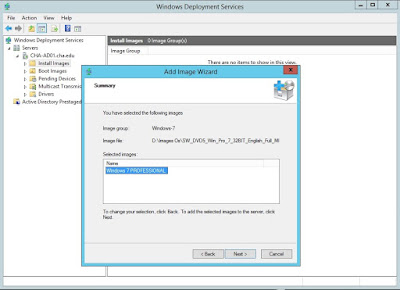 |
| WDS- Boot Image Summary |
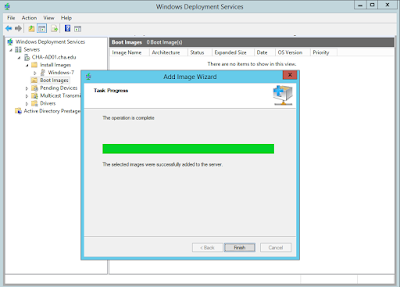 |
| WDS- Boot Image Task Progress |
After adding boot image in WDS Server, now we are ready to deploy operating system in our network environment.
Feel free to comment and share this with your friends.
 Hello folks! Today I’m bringing to you very exciting feature
or we can call it exciting hack or trick. Today we are going to map OneDrive
account. Yes, you heard correct, we are going to map a OneDrive account to our
my computer. No more everytime logging and syncing. By syncing folders between
your cloud storage and PC it occupies Hard Drive space on your PC. By Mapping
it, it doesn’t. This is by far the main advantage with mapping OneDrive as a
network drive is that no files are stored on the computer.

